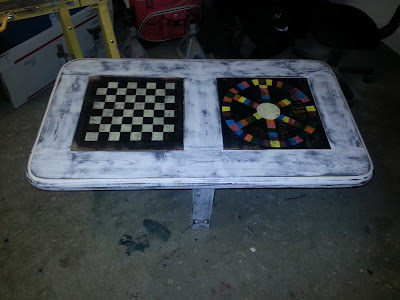
Another table purchased by my friend for what was going to be our business venture (that we have since decided against). This coffee table is sturdy and basic, but had great potential.
 |
The only thing missing was the glass inserts. But for $5 you can't beat it.
|
After racking my brain I finally came up with the idea of putting wood insert in the holes and painting game boards on them. After we decided against the recycle/upcycle business I decided to claim the table for myself as a cute outdoor coffee table.
I first tried staining the inserts and painting the table my favorite blue color (which I already had on hand).
 |
| Then quickly decided...ewwww! I HATED it!!! |
So back to the drawing board. I decided to put off the main part of the table for a bit and work on the game board inserts (maybe seeing the finished inserts would help me decide on the rest of the table).
Here was my process. I knew one board would be a checker board then decided on a trivial pursuit board for the other since we have A LOT of trivial pursuit games.
 |
I used a ruler to get the width of the squares and really just did everything else by eye,
because I wasn't worried about it being perfect. |
 |
| I used a white fabric pencil to make my lines so they would stand out better and then a quick scribble in the squares that were to be painted. I used Apple Barrel craft paint (ivory). After I painted all of the squares I realized that it didn't look great so I painted over the stain with black craft paint (sorry forgot to take a picture of the finished checker board) |
 |
| This is the board for the Trivial Pursuit board, so I started off painting it black over the stain. |
 |
| I used a large bowl for the outer circle... |
 |
| Then used a smaller bowl for the inside of the circle. And of course an even smaller bowl for the middle circle. |
 |
| I then used my ruler to draw out the lines that lead to the inner circle. |
 |
| Then using an actual TP board I labeled all of the squares for easier painting. |
Ok, back to the table. I sanded the blue lightly (just to scuff it up) and painted over it with white paint, and sanded it to give it a weathered/worn look. I put in the inserts and nailed around the edges to keep them in place and sanded over my painted boards as well so that they would also look worn. Then a coat of poly to finish it off. I think it looks pretty cool (doesn't translate well in the pic) once I put it out on the patio I will take another pic maybe that will show it better. :)


No comments:
Post a Comment